Doing a Radial Swipe in UI test

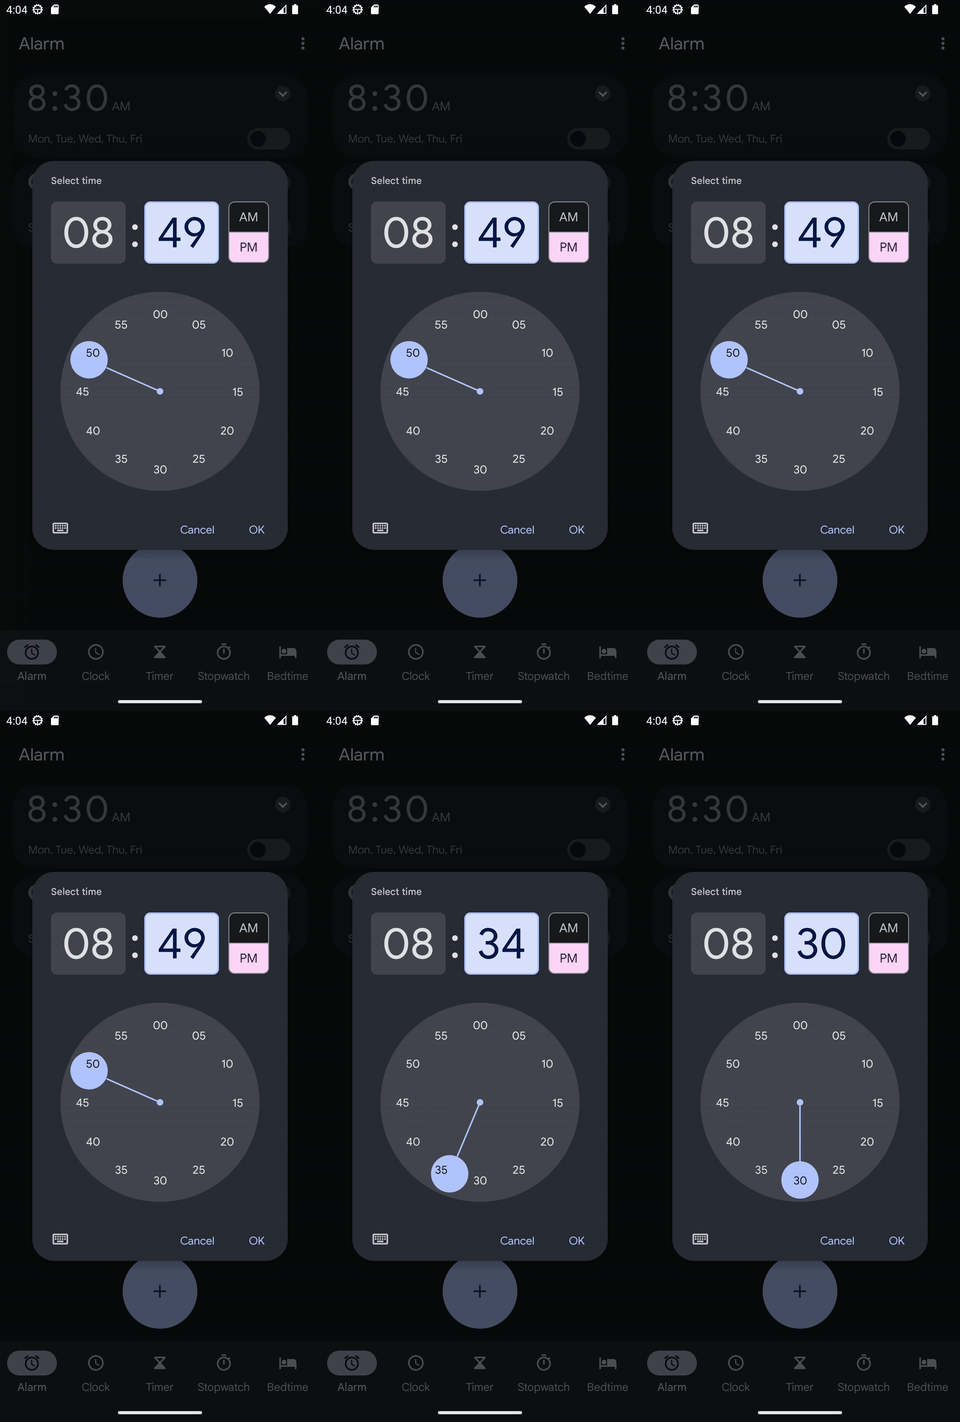
Recently I was running some tests for our product App Quality Copilot at mobile.dev. I encountered an interesting challenge with the Android clock app. The task was to create a straightforward UI test that would set an alarm. At first glance, it seemed like a simple enough task. However, looking at this clock view, I realized that implementing a radial swipe for the UI test is not going to be as straightforward as I initially thought.

Well, one might wonder why not just tap on the numbers to set the alarm. That's a fair point. But from my experience, there are numerous scenarios where tapping might not suffice—take, for instance, seat selections in a ticket booking application or choosing a hue from a color wheel. In such cases, the feasible interactions are often limited to swiping or tapping on predetermined coordinates. In this article, I'm going to explain how one could solve for radial swiping.
Mathematical Foundations for Radial Swipe
Believe it or not, the secret to creating a smooth radial swipe lies in a concept from high school math: the parametric equation of a circle. UI testing frameworks allow us to simulate swipes between two points, so our goal is to find a series of points (let's say 6) along the arc, between the hour and minutes hands.

X coordinate: h+r⋅sin(θ)
Y coordinate: k+r⋅cos(θ)
If we're aiming for points between the 9 and 12 on a clock, we're dealing with a π/2 radian arc. To evenly space 6 points across this quarter-circle, we slice the arc into 6 segments, each π/(2⋅6) radians apart. Starting from the 12 o'clock position, we increment our angle by π/(2⋅6) radians to find the next point, repeating this until we reach the 9 o'clock position.
Setting up test with JS + Maestro
We will be leveraging JavaScript (JS) to dynamically generate the coordinates for radial swipes, taking advantage of its robust control flow structures and built-in mathematical functions. For UI tests, we will be using Maestro to quickly prototype and automate this test.
Generating coordinates
To execute the swipe action, Maestro requires the x and y coordinates to be specified as percentages. We would generate a JSON which has a sequence of 6 points that can be later integrated with the Maestro test. We would also require device dimensions and radius value in pixels which I've already extracted from the device information in Android Studio and coordinates through Maestro Studio. Let's look at this code:
function generateCoordinates(start, end, numPoints, deviceWidth, deviceHeight) {
    var step = (end - start) / (numPoints - 1);
    var coordinates = [];

    // The radius and its impact on the range of x and y values
    var radius = 211.2;

    // 1
    for (var i = 0; i < numPoints; i++) {
        // 2
        var angle = start + (i * step);
        var x = radius * Math.cos(angle);
        var y = radius * Math.sin(angle);

        // Correctly map x and y to screen percentages
        // Assuming the center of the circle is at the center of the screen
        var centerX = 540;
        var centerY = 1056;

        // Calculate screen position based on device dimensions
        var screenX = centerX + x; // x position on screen
        var screenY = centerY - y; // y position on screen (inverted Y-axis)

        // 3
        // Convert screen positions to percentages
        var xPercent = ((screenX / deviceWidth) * 100).toFixed(0);
        var yPercent = ((screenY / deviceHeight) * 100).toFixed(0);

        var coordinateString = xPercent + "%," + yPercent + "%";
        // 4
        coordinates.push(coordinateString);
    }

    return coordinates;
}
- We run a loop till the number of points is required, in this case, 6.
- Calculating the angle for each iteration that is π/2 + i * π/(2⋅6) and applying it to get values of x and y.
- Converting it to percentage with the help of device width and height.
- Pushing the string format of coordinates (x%, y%) in an array.
And calling this method:
var startAngle = Math.PI / 2;
var endAngle = 5 * Math.PI / 2;
var deviceWidth = 1080; // Example: screen width in pixels
var deviceHeight = 1920; // Example: screen height in pixels
var points = generateCoordinates(startAngle, endAngle, 6, deviceWidth, deviceHeight);
Running the UI test with Maestro
Now integrating the above JS with Maestro, and using the output for swipe commands.
appId: com.google.android.deskclock
---
- runScript: generate_coordinates.js
- evalScript: ${output.counter = 0}
- repeat:
    while:
      true: ${output.counter < 5} # Since you need pairs, stop one before the last
    commands:
      - evalScript: ${output.start = output.coordinates[output.counter]}
      - evalScript: ${output.startX = output.start.split(",")[0].replace("%", "")}
      - evalScript: ${output.startY = output.start.split(",")[1].replace("%", "")}
      - evalScript: ${output.end = output.coordinates[output.counter + 1]}
      - evalScript: ${output.endX = output.end.split(",")[0].replace("%", "")}
      - evalScript: ${output.endY = output.end.split(",")[1].replace("%", "")}
      - swipe:
         start: ${output.startX}%, ${output.startY}%
         end: ${output.endX}%, ${output.endY}%
         duration: 300
      - evalScript: ${output.counter = output.counter + 1}
      - waitForAnimationToEnd
In this maestro flow, we run the script to generate coordinates and use the successive coordinates as the start and end for the swipe command.
And that's all!
Final Demo
Here is the final demo of how this UI test looks like:


